Highlights
Substitutions
Table
| # | Team | Pts | P | W | D | L | |
|---|---|---|---|---|---|---|---|
| 3 |
|
15 | 8 | 4 | 3 | 1 | |
| 5 |
|
14 | 8 | 4 | 2 | 2 |
Line-ups
Stats
Player stats
- H. Kawabe 1
- Y. Nakajima 1
- N. Maeda 1
- S. Souprayen 1
- N. Atkinson 2
- Y. Nakajima 2
- G. Ferreyra 2
- S. Sasaki 2
- Y. Nakajima 2
- K. Kinoshita 2
- K. Trewin 66
- Kim Ju-Sung 64
- Kim Ju-Sung 54
- K. Trewin 50
Current form
Last matches
-
Payam Heydari main referee30Card count of its only match arbitrated
- Abdullah Jamali VAR assistant referee
- Ammar Ashkanani fourth referee
- Saud Al Samhan VAR referee
- Farhad Farhadpoor assistant referee
- Ali Ahmadi assistant referee
- Year of construction: 2010
- Surface: grass
- Capacity: 30050
- Average attendance: 10536
- Maximum attendance: 27638
- % sold: 37
Match result Melbourne City Sanfrecce
- Date 16 September 2025 08:45
- Competition AFC Champions League
- Season 2025/2026
- Stage League Stage - East - week 1
- Match attendance 1423
- Code MCY-SFR
- Area Asia
- Home team Melbourne City
- Away team Sanfrecce Hiroshima
What is the result between Melbourne City Sanfrecce?
Sanfrecce Hiroshima won the match with a 0-2 score
What are the official lineups for Melbourne City Sanfrecce?
Melbourne City : Coached by A. Vidmar, the lineup starts off in a 4-3-3 formation: P. Beach, A. Behich (C), S. Souprayen, G. Ferreyra, N. Atkinson, A. Kuen, K. Trewin, M. Leckie, K. Rahmani, M. Caputo, T. Kanamori
Sanfrecce Hiroshima : On the other side of the pitch, the team trained by M. Skibbe, is positioning themselves in a 3-4-2-1 : K. Osako, Kim Ju-Sung, H. Araki, S. Sasaki (C), S. Higashi, S. Tanaka, H. Kawabe, S. Nakano, Marcos Júnior, Y. Nakajima, K. Kinoshita
Who is the referee of the match Melbourne City Sanfrecce ?
Payam Heydari is the referee for this match
Where is the match Melbourne City Sanfrecce?
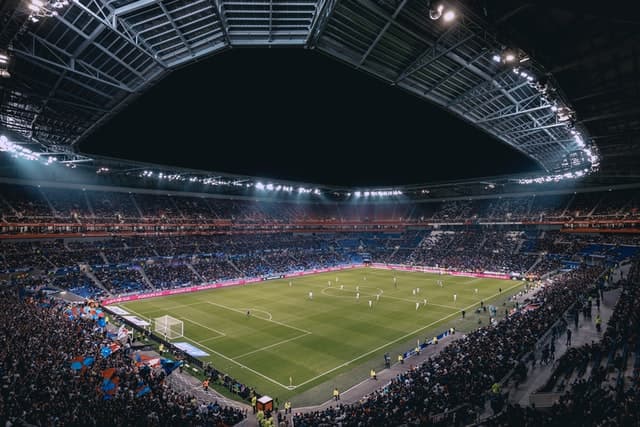
The venue AAMI Park in Melbourne is hosting the match
At what time is Melbourne City Sanfrecce?
Fixture in live on Football Today on 16 September 2025. Kick-off at 08:45
-
-
1
P. Beach
-
16
(C)
A. Behich
-
26
S. Souprayen
-
22
G. Ferreyra
-
13
N. Atkinson
-
30
A. Kuen
-
27
K. Trewin
-
7
M. Leckie
-
47
K. Rahmani
-
17
M. Caputo
-
10
T. Kanamori
-
1
P. Beach
-
-
1
K. Osako
-
37
Kim Ju-Sung
-
4
H. Araki
-
19
(C)
S. Sasaki
-
24
S. Higashi
-
14
S. Tanaka
-
6
H. Kawabe
-
15
S. Nakano
-
10
Marcos Júnior
-
35
Y. Nakajima
-
17
K. Kinoshita
-
1
K. Osako
-
-
 A. Vidmar Coach
-
A. Cartwright
#52
- Striker
-
M. Baker
#48
- Defender
-
D. Ochsenham
#33
- Goalkeeper
-
L. Wong #41 - Midfielder87'
-
L. Bonetig
#4
- Defender
-
H. Shillington #36 - Defender77'
-
B. Mazzeo #20 - Striker76'
-
A. Mackintosh
#53
- Midfielder
-
Z. Schreiber #19 - Midfielder77'
-
E. Durakovic #39 - Midfielder46'
-
R. Kalms
#45
- Defender
-
B. Kutleshi
#44
- Striker
-
-
-
M. Skibbe Coach
-
C. Hill
#38
- Goalkeeper
-
M. Kato #51 - Striker43'
-
T. Yamasaki
#3
- Defender
-
 Y. Chajima
#25
- Midfielder
Y. Chajima
#25
- Midfielder
-
 D. Suga
#18
- Midfielder
D. Suga
#18
- Midfielder
-
 T. Arslan #30 - Midfielder83'
 -
Jeong Min-Ki
#26
- Goalkeeper
-
S. Koshimichi
#32
- Midfielder
-
S. Kobayashi
#45
- Striker
-
 T. Shiotani #33 - Defender67'
 -
 N. Maeda #41 - Striker67'
 -
N. Arai #13 - Defender46'
-
- N. Atkinson 2
- Y. Nakajima 2
- H. Kawabe 88% (43/49)
- S. Sasaki 88% (50/57)
- S. Souprayen 87% (41/47)
| # | Team | Pts | P | W | D | L | GF | GA | GD | |
|---|---|---|---|---|---|---|---|---|---|---|
| 1 |
|
17 | 8 | 5 | 2 | 1 | 15 | 7 | 8 | |
| 2 |
|
16 | 8 | 5 | 1 | 2 | 14 | 7 | 7 | |
| 3 |
|
15 | 8 | 4 | 3 | 1 | 10 | 6 | 4 | |
| 4 |
|
14 | 8 | 4 | 2 | 2 | 10 | 8 | 2 | |
| 5 |
|
14 | 8 | 4 | 2 | 2 | 9 | 7 | 2 | |
| 6 |
|
11 | 8 | 3 | 2 | 3 | 8 | 7 | 1 | |
| 7 |
|
10 | 8 | 2 | 4 | 2 | 10 | 9 | 1 | |
| 8 |
|
9 | 8 | 2 | 3 | 3 | 9 | 11 | -2 | |
| 9 |
|
9 | 8 | 2 | 3 | 3 | 6 | 8 | -2 | |
| 10 |
|
6 | 8 | 1 | 3 | 4 | 7 | 11 | -4 | |
| 11 |
|
4 | 8 | 1 | 1 | 6 | 5 | 13 | -8 | |
| 12 |
|
4 | 8 | 0 | 4 | 4 | 2 | 11 | -9 |
| # | Team | Pts | P | W | D | L | GF | GA | GD |
|---|---|---|---|---|---|---|---|---|---|
| 1 |
|
10 | 4 | 3 | 1 | 0 | 8 | 3 | 5 |
| 2 |
|
10 | 4 | 3 | 1 | 0 | 6 | 2 | 4 |
| 3 |
|
10 | 4 | 3 | 1 | 0 | 5 | 2 | 3 |
| 4 |
|
8 | 4 | 2 | 2 | 0 | 4 | 1 | 3 |
| 5 |
|
7 | 4 | 2 | 1 | 1 | 8 | 6 | 2 |
| 6 |
|
7 | 4 | 2 | 1 | 1 | 4 | 3 | 1 |
| 7 |
|
7 | 4 | 2 | 1 | 1 | 4 | 3 | 1 |
| 8 |
|
7 | 4 | 2 | 1 | 1 | 7 | 7 | 0 |
| 9 |
|
6 | 4 | 1 | 3 | 0 | 6 | 3 | 3 |
| 10 |
|
4 | 4 | 1 | 1 | 2 | 3 | 5 | -2 |
| 11 |
|
4 | 4 | 1 | 1 | 2 | 2 | 4 | -2 |
| 12 |
|
1 | 4 | 0 | 1 | 3 | 1 | 8 | -7 |
| # | Team | Pts | P | W | D | L | GF | GA | GD |
|---|---|---|---|---|---|---|---|---|---|
| 1 |
|
10 | 4 | 3 | 1 | 0 | 7 | 1 | 6 |
| 2 |
|
7 | 4 | 2 | 1 | 1 | 5 | 4 | 1 |
| 3 |
|
6 | 4 | 2 | 0 | 2 | 8 | 5 | 3 |
| 4 |
|
5 | 4 | 1 | 2 | 1 | 5 | 4 | 1 |
| 5 |
|
4 | 4 | 1 | 1 | 2 | 4 | 6 | -2 |
| 6 |
|
4 | 4 | 1 | 1 | 2 | 2 | 5 | -3 |
| 7 |
|
3 | 4 | 1 | 0 | 3 | 4 | 6 | -2 |
| 8 |
|
3 | 4 | 0 | 3 | 1 | 1 | 3 | -2 |
| 9 |
|
2 | 4 | 0 | 2 | 2 | 5 | 7 | -2 |
| 10 |
|
2 | 4 | 0 | 2 | 2 | 2 | 4 | -2 |
| 11 |
|
2 | 4 | 0 | 2 | 2 | 2 | 5 | -3 |
| 12 |
|
0 | 4 | 0 | 0 | 4 | 2 | 8 | -6 |
| # | Team | Pts | P | W | D | L | GF | GA | GD |
|---|---|---|---|---|---|---|---|---|---|
| 1 |
|
18 | 8 | 5 | 3 | 0 | 11 | 2 | 9 |
| 2 |
|
14 | 8 | 3 | 5 | 0 | 5 | 0 | 5 |
| 3 |
|
11 | 8 | 2 | 5 | 1 | 6 | 4 | 2 |
| 4 |
|
11 | 8 | 2 | 5 | 1 | 3 | 2 | 1 |
| 5 |
|
11 | 8 | 2 | 5 | 1 | 3 | 2 | 1 |
| 6 |
|
10 | 8 | 2 | 4 | 2 | 4 | 4 | 0 |
| 7 |
|
9 | 8 | 2 | 3 | 3 | 4 | 5 | -1 |
| 8 |
|
9 | 8 | 2 | 3 | 3 | 3 | 4 | -1 |
| 9 |
|
8 | 8 | 1 | 5 | 2 | 2 | 4 | -2 |
| 10 |
|
7 | 8 | 1 | 4 | 3 | 1 | 4 | -3 |
| 11 |
|
7 | 8 | 1 | 4 | 3 | 1 | 5 | -4 |
| 12 |
|
4 | 8 | 0 | 4 | 4 | 0 | 7 | -7 |