

Highlights
Substitutions
Line-ups
 4-1-4-1

Stats
Player stats

- J. Taylor 2
- M. Wallace 1
- C. Whitely 1
- C. Humphreys 1
- I. Bronkhorst 1
- C. Humphreys 1
- D. Sanches Fernandes 1
- B. Thompson 1
- M. Ifill 3
- K. Grant 3
- M. Pinnock 2
- J. Taylor 2

- R. Balker 85
- I. Bowat 85
- I. Bowat 9
- M. Wallace 9
- G. Saville 9
- J. Taylor 9
- K. Conteh 3
- M. Pinnock 2
- W. Hondermarck 1
- M. Harness 1
- M. Ifill 3
- I. Bowat 3
- O. Sowunmi 6
- I. Bowat 5
- V. Adeboyejo 6
- C. Humphreys 5

- B. Mumba 5
- J. Taylor 4
- M. Young 1
- R. Balker 69
- C. Humphreys 53
- R. Balker 61
- I. Bowat 41
- B. Mumba 2
- M. Ifill 1
Current form
Last matches
 Blackpool
 Bromley
 Mansfield
 Huddersfield
-
Carl Brook main referee3.30Average card count per match for 3 matches arbitrated
- Daniel Blades fourth referee
- Andrew Aylott assistant referee
- Andrew Bennett assistant referee
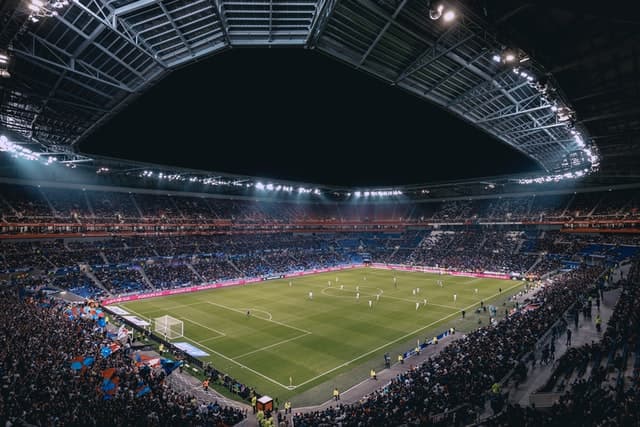
- Year of construction: 1938
- Surface: grass
- Capacity: 6100
- Average attendance: 3901
- Maximum attendance: 5414
- Minimum attendance: 1872
- % sold: 64
Match result Bromley Huddersfield
- Date 19 September 2026 15:00
- Competition League One
- Season 2026/2027
- Stage Regular Season - week 7
- Match attendance 5004
- Code BRO-HUD
- Area England
- Home team Bromley
- Away team Huddersfield Town
What is the result between Bromley Huddersfield?
Bromley won the match with a 2-1 score
What are the official lineups for Bromley Huddersfield?
Bromley : Coached by A. Woodman, the lineup starts off in a 4-1-4-1 formation: O. Mason, C. Headman, K. Grant, O. Sowunmi (C), M. Ifill, G. Saville, M. Pinnock, J. McKiernan, K. Conteh, C. Whitely, V. Adeboyejo
Huddersfield Town : On the other side of the pitch, the team trained by M. Drury, is positioning themselves in a 3-4-2-1 : M. Young, I. Bowat, M. Wallace (C), R. Balker, B. Mumba, C. Humphreys, A. Collins, I. Bronkhorst, J. Taylor, M. Harness, A. Fletcher
Who is the referee of the match Bromley Huddersfield ?
Carl Brook is the referee for this match
Where is the match Bromley Huddersfield?
The venue Copperjax Community Stadium in London is hosting the match
At what time is Bromley Huddersfield?
Fixture in live on Football Today on 19 September 2026. Kick-off at 15:00
Bromley
4-1-4-1
-
-
31
O. Mason
-
2
C. Headman
-
21
K. Grant
-
5
(C)
O. Sowunmi
-
12
M. Ifill
-
6
G. Saville
-
11
M. Pinnock
-
28
J. McKiernan
-
22
K. Conteh
-
18
C. Whitely
-
20
V. Adeboyejo
-
31
O. Mason
-
-
1
M. Young
-
15
I. Bowat
-
3
(C)
M. Wallace
-
12
R. Balker
-
19
B. Mumba
-
20
C. Humphreys
-
8
A. Collins
-
22
I. Bronkhorst
-
9
J. Taylor
-
10
M. Harness
-
11
A. Fletcher
-
1
M. Young
Huddersfield Town
3-4-2-1
-
-
A. Woodman Coach
-
 21'B. Thompson #8 - Midfielder65'
 -
 N. Kabamba #14 - Striker64'
 -
M. Cheek #9 - Striker65'
-
N. Patten
#35
- Midfielder
-
R. Porter
#40
- Goalkeeper
-
 M. Miller #19 - Striker41'
 -
W. Hondermarck #16 - Midfielder80'
-
-
-
M. Drury Coach
-
E. Brierley
#14
- Midfielder
-
 J. Alnwick
#31
- Goalkeeper
J. Alnwick
#31
- Goalkeeper
-
J. Whatmough
#6
- Defender
-
L. Gooch
#7
- Defender
-
J. Low
#5
- Defender
-
S. Tovide #34 - Striker63'
-
D. Sanches Fernandes #30 - Striker63'
-
- I. Bronkhorst 1
- C. Humphreys 1
- M. Pinnock 1
- M. Harness 1
- M. Harness 67% (2/3)
- M. Miller 50% (1/2)
- B. Mumba 50% (1/2)
- M. Ifill 3
- K. Grant 3
- O. Mason 2
- G. Saville 2
- A. Collins 80% (8/10)
- R. Balker 78% (7/9)
- I. Bronkhorst 75% (6/8)
- K. Grant 73% (8/11)
- K. Conteh 3
- M. Pinnock 2
- K. Grant 2
- M. Ifill 2
- M. Harness 100% (3/3)
- B. Mumba 100% (2/2)
- R. Balker 80% (4/5)
- K. Conteh 67% (2/3)
- M. Miller 0% (0/7)
- A. Fletcher 0% (0/6)
- M. Cheek 0% (0/4)
- B. Thompson 0% (0/4)
- M. Cheek 0% (0/2)
- G. Saville 0% (0/2)
- A. Fletcher 0% (0/2)
- B. Thompson 0% (0/2)
- R. Balker 88% (61/69)
- I. Bowat 87% (41/47)
- M. Wallace 85% (63/74)
Blackpool
Bromley
Bromley
 Wimbledon
Bromley
Wimbledon
Bromley
 L Orient
 Sheff Wed
Bromley
Bromley
Sheff Wed
Bromley
Bromley
 Cambridge U
Mansfield
Huddersfield
Huddersfield
Cambridge U
Mansfield
Huddersfield
Huddersfield
 Notts
Huddersfield
Notts
Huddersfield
 Oxford U
Cambridge U
Huddersfield
Oxford U
Cambridge U
Huddersfield
 MK Dons
Huddersfield
MK Dons
Huddersfield
